It's here Quiltin' Peeps!
It's taken 3 months, but, it's finally here!
It went by faster than you thought.....right? It did for me!
Here is the 3rd and last clue,
as well as the final reveal of our.........

This mystery will stay on the blog for a while.
If you, your guild or group would like to use
this pattern, please give appropriate credit.
That is one thing I take for granted, because
I try to give credit where it is due
all of the time....but, I was
reminded by a few friends that I needed to share this here.
PDF LINKS
Reminders:
Keeping things simple.......
When cutting.......cut accurately and consistently.
When sewing......sew accurately, using a consistent 1/4" seam.
When pressing......press seams the same way for all units made.
Please do NOT stress over seams not matching, or nesting. When it comes to scrap quilting, perfection is highly over rated in my opinion. Some of my seams are definitely not perfect!
Also, I do have to admit something to you all here. I am human, and make mistakes on a regular basis. Not just with quilting! LOL If there are any mistakes within the directions of this quilt, please accept my apology right here and now! LOL And, remember, if you don't care for the looks of this quilt, you can ALWAYS donate it to the many charitable and philanthropic organizations that take quilt donations.
Here is Clue #3
This is what we need to sew to complete the units
needed to finish our #SSSSQ
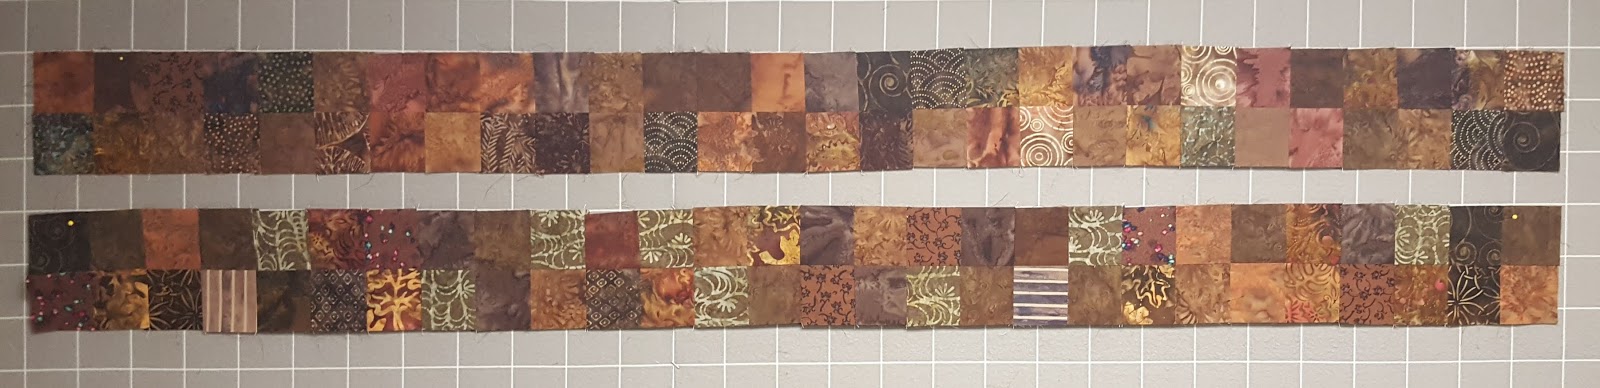
From squares cut previously...... make:
Make 32 units just like the one at the top
of the photo below.

Sew a Color 2, 2.5" square to
a Color 1, 2.5" square.
Press seam to Color 1.
(Like the 4 units in the bottom of photo above.)

Add another 2.5" square of Color 2
being careful to
match the side of the Color 1 square
when sewing.
I did sew the length of the entire 2 patch.
Press to Color 2 square just sewn.
(Hopefully you understand the construction of this?)
We will call this Unit V, because it looks like a "V."
Let's take a look at our
inspiration quilt, shall we?

I found this quilt at an antique mall in South St. Louis County.
I LOVED it the minute I laid eyes on it.
It is similar to a Mosaic Quilt.
 Since I am not an expert in dating quilts, all I can go off of
It is similar to a Mosaic Quilt.

are clues from the fabrics. There are definitely some 30s, 40s, and 50s fabrics
in this quilt. It is an humble hodgepodge of 4 patches with no real
cohesion at the ends of some rows.
 And, those prairie points.......WOW!
The hand quilting is very nice with a lot of cables running
through the pink sections.
 Rounded corners add to it's charm.
Do you see what I see? Ran out of pink!
I built this quilt as I assume the original quilter made it.....or at least tried to. It may seem like weird construction at times, but, I had to compose the pattern as I went. It was REALLY interesting to see the "make-do" nature the original quilter had.
cohesion at the ends of some rows.

The hand quilting is very nice with a lot of cables running
through the pink sections.

Do you see what I see? Ran out of pink!
I built this quilt as I assume the original quilter made it.....or at least tried to. It may seem like weird construction at times, but, I had to compose the pattern as I went. It was REALLY interesting to see the "make-do" nature the original quilter had.
So, what is our version going to look like?

Ta-DAH!
The Simply Sensational Summer Scrap Quilt!
The Simply Sensational Summer Scrap Quilt!
Using 2 contrasting colors really helped this design in my opinion.
The neutral sections are not as flat by scrapping it up a bit.
We will be building the quilt as pictured above so no one gets confused.

You can also look at the quilt like this.
Please remember, we will be building it from
the previous photo.

The brown batik sections look delicious to me!
Lights, mediums, and dark values of
the same color really sing to me!
I completely enjoy the contrast of this quilt.
It measures approximately
72" x 89"
A few inches were added in the correct
construction of this quilt top, as opposed
to the original inspiration quilts humble piecing.
I will do my best to provide photos for each step.
If you find the pdf has too much information for you, or too many photos
for you to print please edit them for yourself to where they make sense for you.
I may do things differently than you would do for yourself, and hey....that is just fine!
You complete this top the way it makes sense to you. We all work differently. If you
have chosen to make half of the units throughout the clues in the directions, add to or
eliminate what you need for this simple design.
Here we go!

Make 9(qty) 16 patches from
some of your Color 1
4 patch units.

Remember, I spun my seams
on the back, but, you press the
way it suits you.

From your Color 1, 2 patch units made in Clue 1,
you will be able to construct the extra units
needed to assemble the center square for this quilt.
Simply put, we need a center square assembled from
169 Color 1 squares.
13 squares by 13 squares.
Please refer to the photo above for easy construction.

Things are coming together now.

And this is our center square for our quilt.

By spinning the seams, my quilt is uber flat!

To border the center square, we will need to sew together
6(qty) Color 2, 4 patch units along with
1 Color 2, 2 patch unit.
Please see photo above.
Make 4

Attach 2 of these to the sides of
the Color 1 center square.

Attach a Color 1, 4 patch unit
to both sides of the remaining
Color 2 borders for the center square.

Attach these to the opposing sides of
the center square.

Our center square is now complete!
Onto our next step...........
We will need to make 4(qty)
each of the next 4 units.
Referring to the photos will be
most helpful for you.

Use 1 Color 1, 2 patch for the center.
Sew a Unit V to both sides.
Add a previously cut Color 2, 2.5" square
to the top paying close attention to
the placement.
Make 4

Sew 2(qty) Color 1, 4 patch units to
1(qty) Color 1, 2 patch unit.
Attach a Unit V to both sides.
Make 4

Sew 4(qty) Color 1, 4 patch units to
1(qty) Color 1, 2 patch unit.
Attach a Unit V to both sides.
Make 4

Sew 6(qty) Color 1, 4 patch units to
1(qty) Color 1, 2 patch unit.
Attach a Unit V to both sides.
Make 4

You should now have 4 each of the
rows as pictured above.

Sew them together
and make 4 of these units.
This is where seams may not nest.
Simply press the way you like best.
I did press toward the single Color 2 square
on these.

Isn't this a neat way to make your center an
on point setting?
We could have used specialty rulers to make
triangles for Unit V, but, I think it is important to be able
to share an approach to something without
having to use a specialty ruler.
Attaching the corner, on point sections.

Make sure to pay attention to where you
attach your corner pieces.
We want those points to go all the way
around the center before we square it up.
Notice where my stiletto is pointing.
We don't want to start sewing at the top
next to that other Color 2 square,
otherwise we will be way off.
You can attach these in any order you wish.
I did opposing corners first.

Again, pay careful attention to the placement
so you don't have to use your seam ripper!

And here is our center square set on point!
Time to trim it!

You can choose how to square your center up.
I trimmed mine using a large square ruler with good
1/4" markings. For the corners,
I lined up the diagonal, trimmed the corners,
then used a longer ruler to trim up the sides.
Again, make sure to include your
1/4" past those Color 1 points. You will need that
1/4" when you add on the next
sections. If you loose some points, don't stress.
I lost some myself!

Here is the trimmed center square on point.
You know those trimmings went into my
neutral crumbs! LOL
Next, you have to make a design decision.....
And, I hate to admit, it, but, the way
I describe this may be a bit confusing for some.
The squares will not match up with the seams
of the set in triangle squares we just trimmed up.
So, I opted to use up some strips.
You do what works best for you.
The squares you will need if you go that route
are NOT factored into or included in any
of the previous clues and instructions.

I used 2.5" strips of Color 2
in varying lengths. This worked for me.
If you do not like this look, you can either use 24(qty)
2.5" squares sewn together, or the equivalent of
one fabric strip. We are adding to the sides first.
(The photo above is intended to show the 2.5"
strip along with a pieced strip of 24(qty) 2.5"
squares in Color 2 on the left side.)
Attach to opposing sides.
For the top and bottom, either use
24(qty) 2.5" squares sewn together of Color 2
or the equivalent of one fabric strip.
Sew a Color 1, 2 Patch to either side.
You can see this in the photo above
where I have attached it to the top and bottom.

To continue this round of border,
sew together 24(qty) 2.5" squares of color 2
and add a Color 1, 2 patch to both sides.
Attach to top and bottom.
(Sorry, no photo, but, you can see
part of it in the previous photo and more
down below.)
Sew 14 Color 1, 4 patches together.
Make 2
Attach to top and bottom of quilt.
You can see this in the next photo.

Sew 16 Color 1, 4 patches together
Make 2
Attach them to the sides to make
a continuous border of Color 1 with
what looks to be 16 patches in all corners.

At this point, this would be a great lap quilt
if that is what you so desire?
We are almost there now!

Sew 16(qty) Color 2, 4 patches together.
Make 4

Sew 16(qty) Color 1, 4 patches together.
Make 2

Sew these rows together like this from
the previous 2 16 (qty) instructions.
Make 2 of these units to add to the top and bottom
of your quilt. I did mine this way, because, it
truly isn't going to matter whether you add the sides on
before the top and bottom due to everything
being pieced. Plus, this made it easier construction
for me personally.
And finally....
Sew 22(qty) Color 2, 4 patches together.
Make 2
Attach to both sides of quilt top.
(I was so excited to complete this quilt top
I didn't get a photo of the individual
side units! Sorry!)
And now.......
Voila!

Your completed #SSSSQ top!!!!
Whew!
Isn't that a great feeling to make
a striking pattern from simple squares.....
a LOT of squares that are no longer
languishing in your scraps and stash????
I know it is for me!
One VERY IMPORTANT
last item we need to take care of
before quilting.......

You will DEFINITELY want to stay stitch
around the entire quilt top so
seams will not pop in the handling of it.
You or your quilter will thank you
for doing this!
My version is off to my friend Kim
for quilting!
I can't wait to show you how I
am getting it quilted!
I want to thank you all for playing along with me in your
scraps and stash this summer.
I hope you have enjoyed it as much as I have!
I would also like to thank my friend Alycia
of Alycia Quilts and her son Little Bit
for helping me with the badge for this
mystery quilt. Check out her blog now
for the mystery she is starting!
I would also like to thank my friend Joyce
for helping me with the PDFs for this
mystery!
Thanks for all of the encouragement!
Enjoy what is left of your summer!
Keep on Quilting!
Kevin the Quilter
WOW! Nice job Kevin!! The original is so charming and you did a terrific job in reproducing it in a great color scheme!! You said I'd love it, and you were right!!
ReplyDeleteWonderful quilt! I'm looking forward to getting my top completed and to seeing yours when it's back from the longarm quilter. Thank you for providing a fun project this summer.
ReplyDeleteWhat a GREAT quilt! thanks so much for leading us in this awesome fun project. I love it.
ReplyDeleteAnd I love the original!!
How are all the babies doing in this HEAT???
WOW!!! That is amazing!! I am so happy with the Fabrics I picked for this one - as I have a feeling I will be keeping it!!! Stunner!!
ReplyDeleteOMG that is amazing!
ReplyDeleteI can't even imagine how my pile of blocks is going to turn into something like that!
But I'm trusting you and will just take it step by step and see what happens!
Congrats on another incredible Scrap Club Mystery, Kevin!! The BIG reveal add plenty of options for those of us who are a bit behind. OK, maybe I didn't start yet... Details, details!!!
ReplyDeletegreat quilt Kevin - congrats on another successful mystery project
ReplyDeleteNo doubt, that ate up a lot of scraps!
ReplyDeleteO.k., I have to say, I did not see this one coming! I think the greatest test of a mystery project is that the maker has no clue until the final reveal. You nailed it! I can't wait to get the top done. I am going to add a red border to my blue and white and donate it to Quilts of Valor. Thanks for a great project!
ReplyDeleteWow - I'm glad I waited to see what you were working towards before I started. The one four patch project I pulled out and worked on is NO WAY like this one even with a lot of four patches involved. I love the inspiration quilt - love love love. No wonder it stuck with you!
ReplyDeleteWow, Kevin. I love the PANK quilt the best. Yours is nice, colorful and very fall like, with a smitch of rustic. I love it......... but, the pink quilt, I love it.
ReplyDeleteThis is a sweet sew along and I am excited to see everyone's result
Kevin, you are a great friend
Tried to comment last night but then realized I wasn't signed in to Google...so I'm back. Lovely design! Thank you for the wonderful mystery. This is a great stash buster!
ReplyDeleteVery cool! I can't wait to get going on Clue 3 and the finish! Your quilt looks wonderful and it'll be even more awesome after quilting. Thanks for offering the mystery!
ReplyDeleteI'm off and running with this to get'r done - borders - ughhhhhh!
ReplyDeleteWow!! What a cool final design! And I love your "get 'er done" method, too :)
ReplyDeleteLove it, Kevin! At least two of us from the Marshall night guild are playing along, maybe more. Mine is in green and neutral, it will go to the Tiny House project in Kansas City for homeless veterans.
ReplyDeleteGina in Missouri
I love that you re-created this tricky to figure out quilt. Yours looks amazing!! Brave of you to take on the directions for this unconventional quilt.....don't let any crabby quilters bring you down ;-) You've done and awesome job....especially with the pictures :)
ReplyDeleteThe quilt looks beautiful! I've actually have a start made since Nanette gifted her 4 patches to me when she got bored sewing them. She may wish them back now but too late! Have a wonderful rest of the summer and thanks for the beautiful quilt pattern. Happy Stitching!
ReplyDeleteIt is truly a winning design, Kevin. Love the original AND your re-creation of it.
ReplyDeleteThis has been such a fun project. I'm way behind on my bits and pieces, but I'll eventually get them done and a quilt made. Thank you for such a fun design that went really did a number on my scrap bins!
ReplyDeleteReally pretty quilt top. I, unfortunately, did not get to participate after all. Our family has had some unexpected events recently. The most awful is losing my twin sister.
ReplyDeleteYours turned out nice.
ReplyDeleteThese are all beautiful quilts! Guess I'll jump on the SSSSQ Train next year. Congratulations to the winners and congratulations to all the finishers -- all winners in my book!
ReplyDeleteIs there a traditional name for this pattern besides the name you gave it? I purchased a quilt flimsy last fall which is very similar to this quilt. Hope you're doing ok.
ReplyDeleteI Want to use this medium to appreciate an online ghost hacker, after being ripped off my money he helped me find my cheating lover and helped me hacked his WHATSAPP, GMAIL, kik and all his social media platforms and i got to know that he has being cheating on me and in less than 24 hours he helped me out with everything, hacking setting is trust worthy, contact him via: hackingsetting50@gmail.com
ReplyDeleteI Want to use this medium to appreciate an online ghost hacker, after being ripped off my money he helped me find my cheating lover and helped me hacked his WHATSAPP, GMAIL, kik and all his social media platforms and i got to know that he has being cheating on me and in less than 24 hours he helped me out with everything, hacking setting is trust worthy, contact him via: hackingsetting50@gmail.com
ReplyDelete