It is time for the fifth and final clue in our "Sapphire Stars" mystery quilt!
If you have made it this far, you might as well keep on going and finish this quilt top!
Not to mention, quilt, bind, and label it!
This clue comes from a spirit of scrappiness, and as you all know, my personal goal is to make a quilt as scrappy as possible. With this in mind, this is how I personally worked this clue. If you know of a more simple way that is up to you. I only ask one thing, don't bash the scrappy quilter here! LOL
I am an unpaid quilter that is only wishing to share his passion with his fellow artists.
Keeping it as simple as possible.....
Here we go!
For this clue you will need:
12 Red (All shades of red) 6.5" Squares
12 Yellow (All shades of yellow) 6.5" Squares
24 6 7/8" Neutral Squares
We will also need our
24 light blue 1.5" x 6.5" strips
and
24 bright blue 1.5" x 6.5" strips
These were cut in clue #3.
(If you haven't cut these strips yet, just cut them now....
we will wait for you.....LOL)
Let's begin!

Take your red and yellow squares and cut them
twice on the diagonal.
(Yellow squares not pictured.)

Like this........

You will now have a total of
48 Red quarter square triangles
and
48 Yellow quarter square triangles
Next....

Bring out those 1.5 x 6.5 strips of light and bright blues

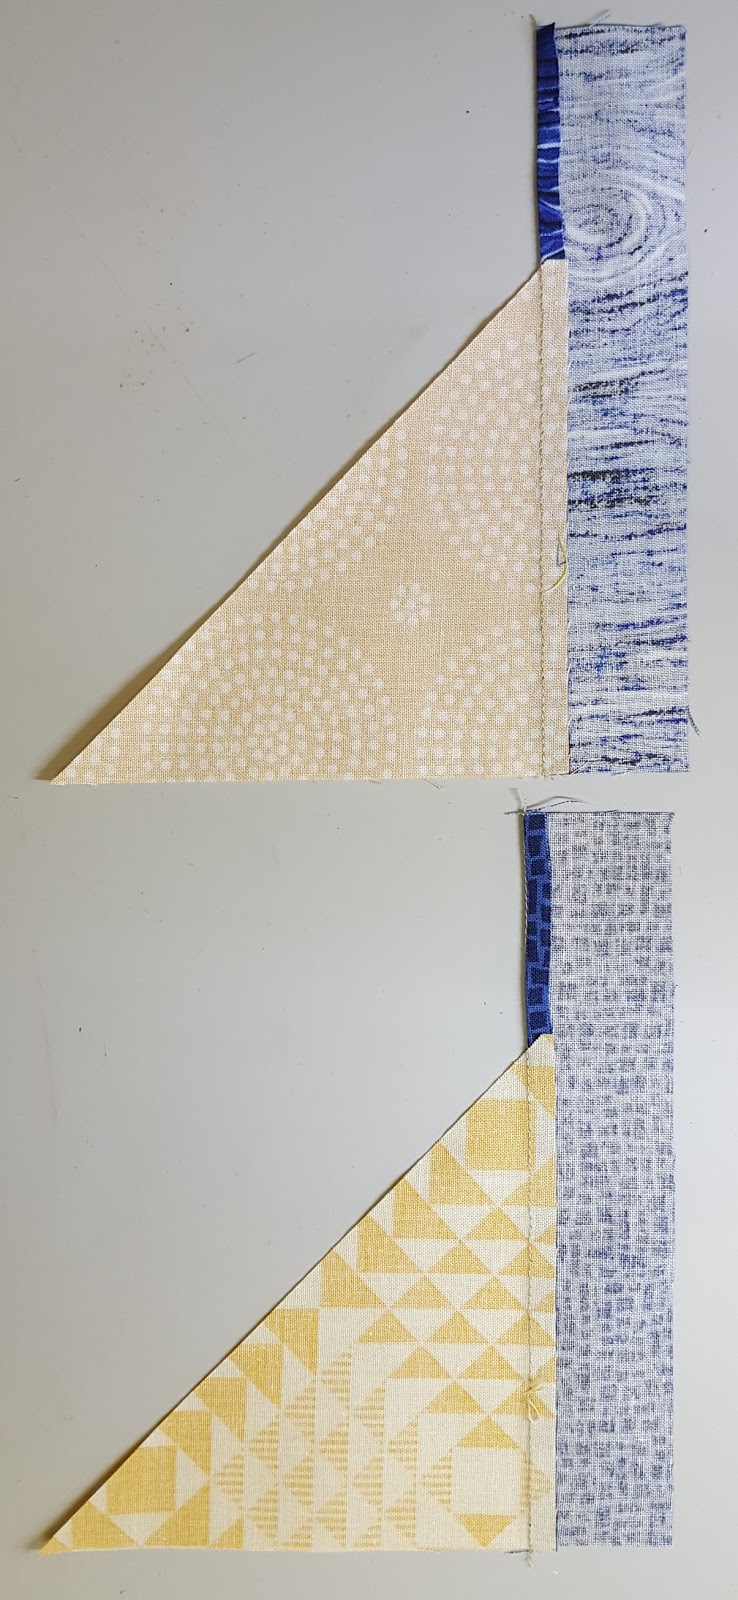
Pair the light blue strips with the red triangles
like this.

Pair the bright blue strips with the yellow triangles
like this.
MAKE SURE the bottom remains even
as pictured in the photos.
We want that tall tip at the top.
We will be sewing these units just like this.
Please don't worry about that strip being a little longer
than the top of the triangles.....we will take care of that later.

Sew the strips to one side.....
Press toward the strip.
(For both red and yellow triangles)
Here is a view from the reverse side
of some of the yellow triangles.
(Do this for both red and yellow triangles.)

We are half way there with this part.
Lay the other quarter square triangles on
the other side just like this.

Sew another quarter square triangle
to the other side of the strip.
Make sure you have the triangle positioned
correctly.
(Do this for both red and yellow triangles.)

Once again, press toward the strip.
Here is a reverse side view to help you.

Hmmm.....what should we call these at this point???
Dragonfly units??? Broom units????
LOLOLOLOL
We aren't quite done yet......

Take these units to your cutting table.
Line them up as best as possible on your lines like this......
the lines are used simply for reference marks.

Now place a ruler that has a diagonal line
on top of the unit. Refer to the photo above.
We are going to trim that extra strip off.

Do this to both the yellow and red triangle units.

Chop! Chop!
Just like that!
I added some length to the strip because I wanted
to allow some room for error for myself.
It DOES NOT bother me that the extra is waste.
Truth be told, not all of my strips are "perfectly" centered.
Please do NOT report this to the quilting police????? LOL

Pretty simple, right?
I am SURE this can be made as one block
and cut down the center.....but, as I said before,
I want my quilts to be as scrappy as possible and
ALL of my yellows, reds, and both shades of
blues are different.
I did this by using one quarter square triangle
as a template for cutting the rest from
various red and yellow scraps of fabric.
I did this by using one quarter square triangle
as a template for cutting the rest from
various red and yellow scraps of fabric.
I know.......call me crazy!
You won't be the first that has! LOLOL
Are we done??????
Not quite yet......
We need to add something to these!

We need to add another side to these units we just made.....
you can use a variety of tools to get that other side
cut appropriately.

I chose to use the easy angle ruler to get mine cut.
and you know why........variety, variety, variety
of neutrals! LOL
However, if you cut a 6 7/8" square of neutral
on the diagonal once, that will work out just fine.

24: 6 7/8" squares of neutral
cut once on the diagonal will yield
the 48 half squares of neutral we need to
complete this last unit.

Align your yellow units with a neutral......
they will only fit one way....
and chain piece them through the machine.
Do the same with your red units.

I do finger(nail) press because I feel it gets the
crease down to the thread
where it needs to be when pressing with an iron.
Press toward the yellow and red, away from the neutral.
This may seem wrong to you, but, it
will help with nesting seams in the final assembly of
the quilt top.

You should now have:
24 yellow half square triangles
and
24 red half square triangles.
Trim to 6.5" squares.
I did not have to trim much at all.

I just had to lay out some units to see what they
would look like.......and
I think I may have to make a quilt like this some day!

There you have it!
I am going to give you all a day or two to
chomp away at this clue.
Also, it's a nice feeling keeping you
in suspense.
LOLOLOLOL
I promise to share with you all
the last steps of this mystery in a few days.
Get this unit made so you can
join in the final reveal of....
Here are ALL of the links to this mystery:
Sapphire Stars Intro
INTRO PDF
Clue #1
Clue #1 PDF
Clue #2
Clue #2 PDF
Clue #3
Clue #3 PDF
Surprise Clue #4
Clue #4 PDF
Clue #5 PDF
Thanks to Heather for all of the PDF's!
You have done an amazing job on all of them!
INTRO PDF
Clue #1
Clue #1 PDF
Clue #2
Clue #2 PDF
Clue #3
Clue #3 PDF
Surprise Clue #4
Clue #4 PDF
Clue #5 PDF
Thanks to Heather for all of the PDF's!
You have done an amazing job on all of them!
Thanks for all of the encouragement!
Keep on Quilting!
Kevin the Quilter
And I'm still on Clue #2 (of course, I'm making 3 different ones).
ReplyDeleteOh Kevin, I can't believe a lady of my vintage could get so excited anticipating this clue. Really need to get out more, but you've made this such a fun project, your directions are so clear (and entertaining!) - well, it just IS exciting! I'm half tempted to leave all the component units artfully arranged as a decorative centerpiece.... thank you for such a great project!
ReplyDeleteUhh, Kevin? How can it be the FINAL clue, if you haven't told us how to put all the parts together into a quilt top?!?! :P
ReplyDeleteMore fun, cannot wait to see the bits assembled.
ReplyDeleteHope to cut the pieces today. Can't wait to see how it goes together a all the clues are so different looking.
ReplyDeleteThis is really an exciting mystery. I hope to get STARTED soon :-P
ReplyDeleteHurray, I figured it out! It's going to be a quilt! You are going to show us how to put all these together, right?
ReplyDeleteExcited to start this clue, but a friend just got a breast cancer diagnosis, so a quilt for her has taken the first place in queue. I'll be back!
ReplyDeleteThanks for doing this mystery, Kevin.
I'm enjoying reading all the clues, even though I'm not sewing along! I don't often do quilt-a-longs (QAL) but I do quilt-em-afters (QEA) where I go back thru the posts and sew at my leisure! What can I say, I'm always late to parties, too :)
ReplyDeleteYay!!! I finally had enough recovery to do things that are non-handwork, and first thing I did was to catch this clue up today. Thanks, Kevin!
ReplyDeleteVisit onlinecasinosforrealmoney2.com to start the best playing in October, 2019. Discover an amazing bonuses and prizes here.
ReplyDelete